Welcome to the Editing Insiders Newsletter where, for the next few months, I (both an award-winning editor and best-selling author) will walk you through the steps I am currently taking to edit my next book.
If you’re new, you might want to read Part 1 over here where I talk about my writing style and give some tips that will help set up your edits.
Today, we’re diving into actual edits.
Why Edit in Order
Why do we take edits in order? Doing edits in order saves us from doing unnecessary work.
Think about it. If you work hard on word choice and comma placements only to later realize you need to delete the scene, you’ve wasted time. So let’s not waste time.
We’re going to zoom out to 10,000 feet and start with Macro edits—plot structure, character and theme arcs, etc. Since first-round edits is where I live and breathe for my day job, I’ve got all the nitty gritty awesomeness for you.
Let’s dig into where I start.
Research Holes
As a reminder, when I’m in writing mode, I will stop to research little bits of information—the origin/etymology of a word or the map of a city. But I try not to stop writing too much to backtrack or get stuck with larger sections of missing information, especially if I know it won’t drastically change what I’m writing.
But research holes can affect the trajectory of a book. Like finding out the museum security isn’t staffed by volunteers like you thought, but by police officers. Yikes! That’ll affect the outcome.
So before I jump into edits, I stop and make sure I have as much of the necessary information as I can. How?
As I write, I keep a list of the big concepts I still need to research:
* I mark a gap in the manuscript with something searchable. I use square brackets around the topic I need to research.
* Then I often drop a note in the inspector in Scrivener. You can also keep a running log in Word.
* At that point, if I know the information won’t be readily available, I also will contact someone for help.
My first step after I finish a book is often to go research the big holes.
For research, librarians are your friends as are smaller museum docents.
They love research and people who are friendly and interested in the same things they are. You can also reach out on Facebook and ask for experts in a particular area. That’s how I found someone who works in Myanmar (formerly Burma) for my newest book, Darkness Calls the Tiger.
For my current work in progress (WIP), I had contacted a museum and they sent a mountain of documents via Google Drive. It has schematics for old security systems and lists and descriptions and all the things that make this historical writer’s heart happy. Isn’t technology grand?
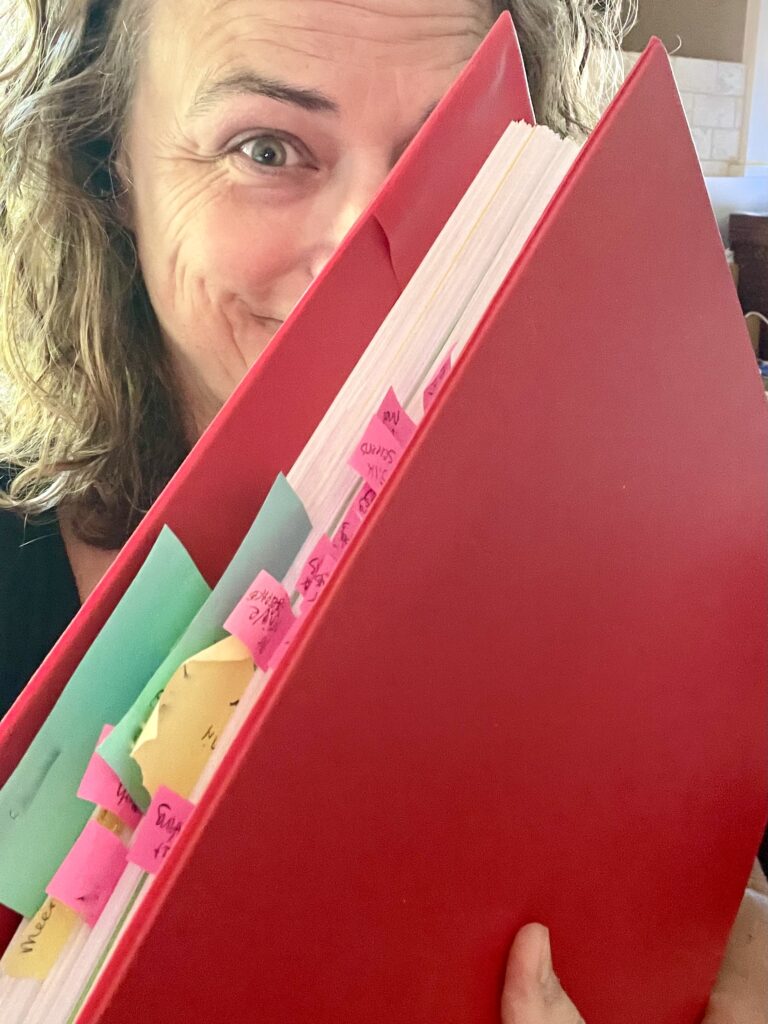
Except that the electronic files aren’t searchable and are sometimes upside down or sideways. So I printed off some of the information that I want to be able to reference in hard copy. Maps and charts especially make more sense to my brain when they’re printed. All of those printed pages got hole punched and then topically organized into an enormous 3-ring binder.
As I read the research, I take notes in Word and use headlines and styles to keep everything organized.
Styles combined with the sidebar/navigation feature will make looking up details much easier. This feature makes it so you can click on the sidebar headline and jump to the place in the document referencing the headline.
Don’t know how to use or make styles? Check out the video here: https://www.facebook.com/groups/EditingInsiders/posts/435458877356882/
The navigable outline appears in the sidebar (View/Sidebar/Navigation).
If I still have holes in my research (which I do), I reach out to as many people as I can think of who might have the information or know who to contact who might have the information.
With all the research fresh in my mind, I move on to the actual first round edits.
The Outline Is Your BFF
The first step to edits is to make a set of chapter summaries (or annotated outline). I know. You might hate outlines. I’m not a fan either (see my first post about my process). BUT outlines are the bees’ knees when it comes to trying to edit the structure of a book.
When complete, you have a 10,000 foot view of your book that you can read in one sitting without being distracted by word choice, weird sentence structure, or the dreaded comma.
It will also give you a leg up on writing longer synopses for your proposal. Win-win.
How do you create chapter summaries?
1. Skim each chapter and write a super boring, bare-bones summary of that chapter.
Try for a few sentences, maybe a paragraph, for each chapter.
This summary isn’t for anyone but me, and it is decidedly ugly.
Don’t worry about grammar or style. You can even use bullet points if that makes most sense to your brain.
RESIST the urge to edit your book or the summary.
We’re skimming for basic information here. If you run across something in your manuscript that needs fixing, make note of it and then move on.
In Scrivener, I write my summary in the synopsis part of the inspector (the sidebar found by clicking the information “i” in the upper right corner). Be careful to be clicked on the chapter in the binder as you can take notes on any individual part of the book as well (parts, scenes, the entire manuscript), but the notes stay with whatever is highlighted.
In Word, start a new document and keep notes on individual chapters. (On a Mac you can toggle between windows using CMD + ~). You can use the navigable outline to help too (see https://www.facebook.com/groups/EditingInsiders/posts/435458877356882/ to learn how to set up styles and the navigation sidebar).
If I know I’m struggling with an arc (character, romance) or tracking a theme, I’ll use a separate color and track that specific part in addition. This is something you can always add later. Mostly just get’er done!
2. Transfer into the outline any notes you made to yourself about the chapter while writing.
I usually have questions or reminders to myself as I’m writing. I put all of those in square brackets so they’re easy to find. So in my early drafts you’ll see things like: “[don’t forget about Jake.]” or “[insert more romantic tension here.]”
And with all that research fresh in my mind, I’ll add in notes on what to add there as well: “[the carpet is dark gray so it might hide blood. Use it!]”.
You’ll see why I duplicate these notes in the summary in a second.
But to actually …
3. EXECUTE the summary:
Once you have the summaries complete. Print that sucker off.
In Scrivener, you can compile an outline by selecting the outline selection on the left side of the compile screen.
If you’re using Word, just print.
If you haven’t already, you might also consider creating a bare bones timeline or calendar . . . especially if you’re a historical writer and are watching the timeline of real events. Print that off too.
Then join me next time for what to do with the summary!
Want more great publishing advice? Check out this upcoming workshop:
How to Get and Keep an Agent and Editor
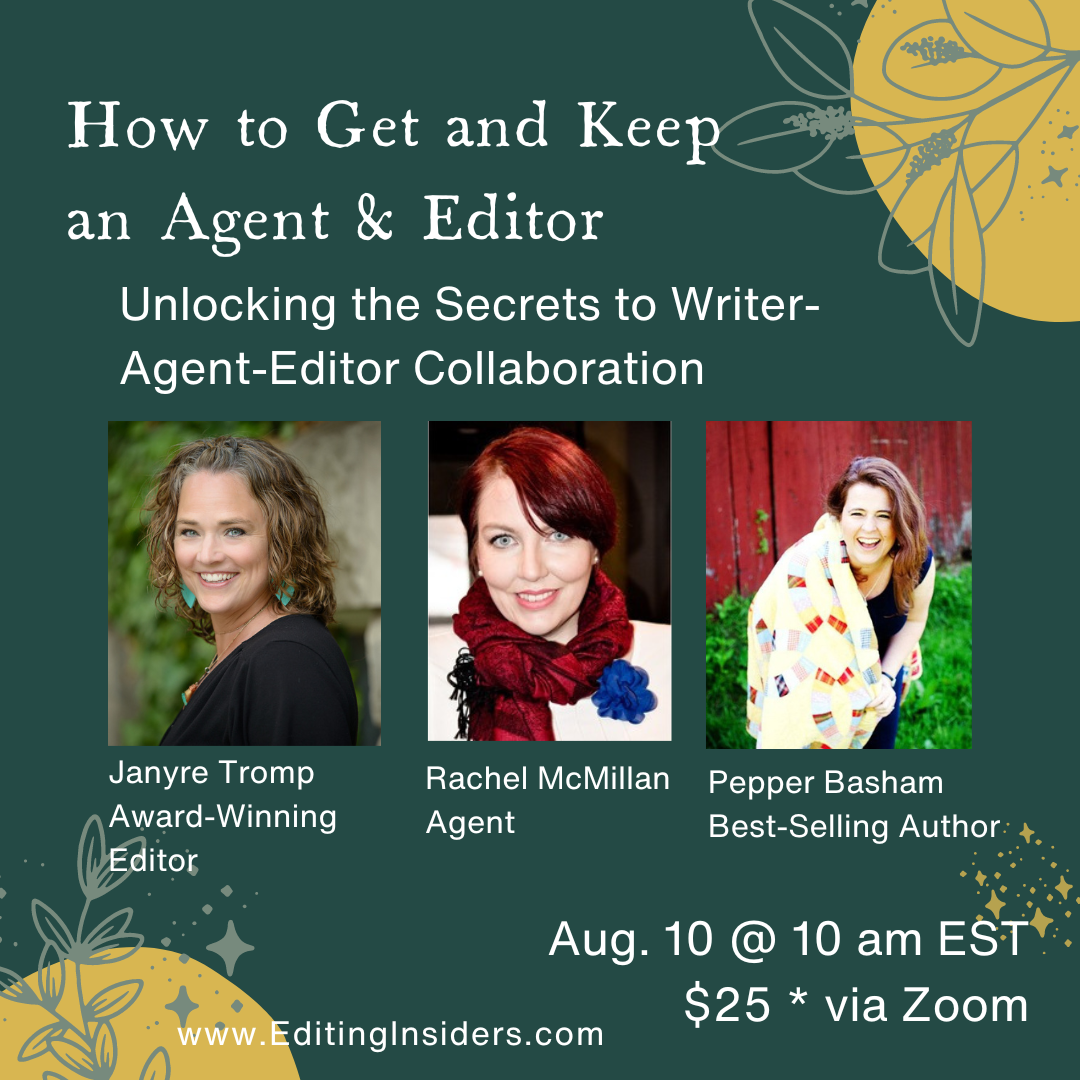 One of the most stressful parts of being a writer is finding an agent and then an editor . . . and then keeping them. Want to know the secrets?
Join me (an award-winning editor), Rachel McMillan (an agent), and Pepper Basham (a best-selling author) where we’ll spill the tea on the industry, querying, and navigating your way to the coveted YES!
Grab your ticket for $25 HERE.
Space is limited.
So helpful, Janyre. I’m terrible about rewriting and polishing. before I’ve completed my first draft.